To take stunning photos with your smartphone, master your camera settings like ISO, focus, and aperture to control light and clarity. Use composition techniques such as the rule of thirds and leading lines to add visual interest. Prioritize natural light, avoid harsh midday sun, and shoot during golden hour for beautiful glow. Keep your lens clean and experiment with different angles and perspectives. For more tips to elevate your photos, keep exploring how to access your device’s full potential.
Key Takeaways
- Use manual mode to control ISO, shutter speed, and focus for sharper, professional-looking photos.
- Apply the rule of thirds and leading lines to create balanced and engaging compositions.
- Capture photos during golden hour or in diffuse natural light to enhance warmth and reduce harsh shadows.
- Experiment with different angles and perspectives to add depth and visual interest.
- Keep your lens clean and use subtle filters and editing to refine and enhance your images.
Master Your Camera Settings
To take better photos with your smartphone, you need to understand and adjust your camera settings. Using manual mode gives you more control, letting you fine-tune your shots instead of relying on automatic settings. One key adjustment is ISO, which controls your camera’s sensitivity to light. Lower ISO values, like 100 or 200, are ideal in bright conditions, preventing grainy images. Higher ISO settings, such as 800 or above, help in low-light environments but can introduce noise. By mastering ISO adjustment, you can balance exposure and image quality. Experiment with manual mode to set ISO, shutter speed, and other parameters, giving you sharper, more professional-looking photos. Taking control of your camera settings disclose your smartphone’s full potential for stunning images, much like how Honda Tuning enhances vehicle performance through precise modifications. Additionally, understanding essential oil safety can help you create a safe environment when experimenting with new techniques. Recognizing the importance of energy-efficient cloud servers in technology can inspire sustainable choices in your photography gear and accessories. Moreover, exploring home theater projectors can inspire ideas for creating immersive viewing environments that complement your photography display setups.
Focus and Exposure for Perfect Shots

Achieving sharp, well-lit photos hinges on mastering focus and exposure settings. To create images with the desired depth of field, you need to control your aperture. A wider aperture (smaller f-number) blurs the background, making your subject stand out, while a narrower aperture (larger f-number) keeps more in focus. Tap on your screen to lock focus on your main subject, ensuring it’s sharp. Adjust exposure by sliding your finger up or down to brighten or darken the shot, balancing light and detail. Proper focus and exposure work together to enhance your photo’s clarity and mood. Additionally, understanding how air quality can influence your outdoor photography conditions might help when arranging your photography space for better stability and safety. Paying attention to lighting conditions can further improve your results by helping you decide the best times of day to shoot. Being aware of vehicle modifications can also be beneficial if you’re planning to photograph customized cars, as they often feature eye-catching aesthetic enhancements. With practice, you’ll quickly learn how to fine-tune these settings for perfect shots in various lighting conditions.
Use the Rule of Thirds and Composition Techniques

Using grid lines helps you create balanced photos, guiding your subject to the right spot. Leading lines draw the viewer’s eye directly to your main focus, making your shot more dynamic. Framing and cropping techniques let you refine your composition, adding depth and emphasis to your image. Incorporating color theory principles can enhance the visual appeal and harmony of your photos. Additionally, understanding how to blend different design elements can help you craft more compelling and cohesive images. When applying these techniques, consider how vibrational energy influences your mood and creativity, leading to more inspired shots. Being aware of juice cleansing benefits and side effects can also inspire creative ways to incorporate healthy lifestyle themes into your photography. Moreover, familiarizing yourself with local legal resources can provide valuable support if you encounter challenges during your creative projects.
Grid Lines for Balance
Grid lines are a powerful tool to help you create balanced and visually appealing photos. They assist in the proper alignment of your subject, ensuring elements are positioned harmoniously within the frame. By enabling grid lines on your smartphone camera, you can easily apply the rule of thirds, placing key points along the intersections for a natural flow. This technique guides your eye and creates a sense of balance without clutter. Use the grid to align horizons, objects, or subjects off-center to add interest. Proper alignment through grid lines makes your composition more engaging and professional-looking. Remember, the goal is to create a balanced image that draws viewers’ attention naturally. Mastering grid lines enhances your ability to craft compelling photos effortlessly. Understanding composition techniques can further improve your photographic skill and help you develop a keen eye for visual harmony, making your photos stand out. Additionally, exploring collaborative brainstorming can inspire new ideas for creative framing and composition choices. Techniques like using the rule of thirds can also help you maximize the impact of your photos by emphasizing the most important elements. Developing an awareness of attention to detail ensures your images are polished and captivating.
Leading Lines Focus
Leading lines are a powerful way to guide the viewer’s eye straight to your main subject, creating a sense of depth and movement in your photos. Use natural or man-made elements like roads, fences, or rivers to form these lines. When you incorporate leading lines with the rule of thirds, position your subject at one of the intersections to enhance visual impact. These lines direct attention and add structure, making your composition more dynamic. Focus on aligning the lines to lead naturally toward your focal point, drawing the viewer into the scene. By carefully leveraging leading lines, you establish strong visual depth that makes your photo more engaging and compelling. Practicing techniques like composition strategies can help you identify and use leading lines more effectively in your smartphone photography. Additionally, understanding sound design concepts such as creating immersive audio experiences can inspire you to think about your photos in a more multi-dimensional way, enhancing overall creativity and presentation. Incorporating visual hierarchy principles can further improve how viewers interpret your images and emphasize key elements. Exploring lighting techniques can also help highlight these leading lines and add mood to your shots.
Framing and Cropping
Once you’ve established your leading lines, framing your subject effectively can make a big difference in how your photo resonates. Use framing techniques to draw attention to your subject and create balance. The rule of thirds is a powerful tool—imagine dividing your frame into nine equal parts and placing key elements along these lines or at their intersections. This technique guides the viewer’s eye naturally and adds visual interest. Cropping also plays an essential role; consider framing tightly to emphasize your subject or stepping back to include context. Avoid centering your subject unnecessarily, as it can make images feel static. By applying the rule of thirds and thoughtful framing, your smartphone photos will become more engaging and professionally composed.
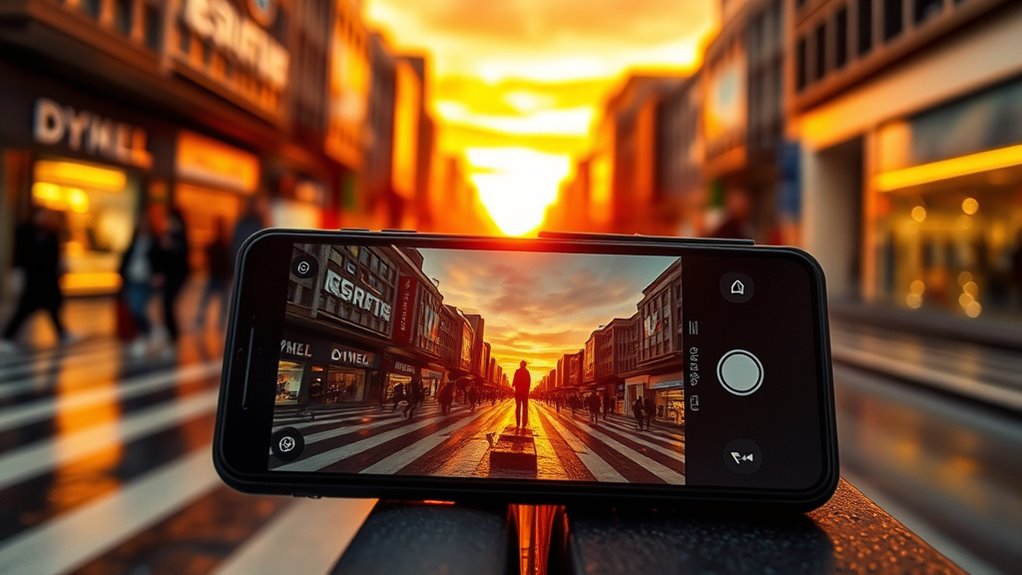
Find the Best Lighting Conditions

Lighting can make or break your photos, so it’s essential to choose the right conditions. Stick to natural light whenever you can, and avoid harsh shadows that can obscure details. Shooting during golden hour gives your images a warm, flattering glow that elevates your photos instantly.
Opt for Natural Light
Natural light is your best friend when it comes to capturing stunning smartphone photos. It provides natural illumination that enhances colors, details, and depth in your images. Whenever possible, opt for outdoor shooting during the day, especially in the morning or late afternoon when the light is soft and warm. Avoid harsh midday sun, which can create unflattering shadows and overexposed highlights. Instead, look for shaded areas or cloudy days, where the light is diffused evenly. Using natural illumination ensures your photos look vibrant and true to life without needing extra editing. Remember, the key is to utilize the quality of natural light to bring out the best in your subject, making your photos more compelling and professional-looking.
Avoid Harsh Shadows
Harsh shadows can ruin an otherwise great photo, so it’s important to find the right lighting conditions. To soften shadows, use a diffuse flash or bounce light off a nearby surface, which spreads light evenly and reduces contrast. Avoid direct sunlight during midday, as it creates sharp, unflattering shadows. If you’re shooting indoors, position yourself near windows with sheer curtains to diffuse natural light. When using your smartphone’s flash, consider activating a diffuser or opting for a diffuse flash setting, which minimizes harsh highlights and prevents reflections that can distract from your subject. By controlling light sources and avoiding direct, intense light, you’ll achieve more balanced photos with softer shadows, making your images more appealing and professional-looking.
Utilize Golden Hour
To capture stunning photos with your smartphone, take advantage of the golden hour—the period shortly after sunrise or before sunset when the light is warm, soft, and evenly distributed. During this time, natural light creates a beautiful glow that enhances your photos’ colors and textures. Position your subject to face the light to avoid harsh shadows and ensure even illumination. The golden hour’s gentle illumination reduces the need for editing and adds a professional touch to your images. Remember, this fleeting window offers ideal lighting conditions, so plan your shoot accordingly. Utilizing golden hour lighting helps you achieve vibrant, warm photos that stand out, making your smartphone shots look more polished and enchanting.
Keep Your Lens Clean and Clear

A clean lens is essential for capturing sharp, high-quality photos with your smartphone. Dirt, fingerprints, and smudges can obscure optical clarity, resulting in blurry or dull images. Regular lens maintenance guarantees your photos stay crisp and vibrant. Always use a microfiber cloth to gently wipe the lens, avoiding scratches. Keep a lens cleaning kit handy for quick touch-ups. Remember, a clear lens boosts your confidence and makes every shot count.
| Feel Confident | Capture Beauty |
|---|---|
| Your photos will pop with clarity. | Every detail shines through. |
| Say goodbye to blurry shots. | Your images become true reflections. |
| Trust your equipment. | Feel proud of your work. |
| Keep it simple, keep it clear. | Elevate your photography game. |
| Maintain your lens regularly. | Enjoy stunning results. |
Experiment With Angles and Perspectives

Trying different angles and perspectives can dramatically transform your smartphone photos. Don’t settle for eye-level shots; instead, experiment with creative angles to add interest and depth. Get low to the ground or shoot from above to create unique perspective shifts that grab attention. Moving around your subject allows you to see new ways to frame the shot, highlighting different features or creating dramatic effects. Playing with perspective shifts can turn a simple scene into a compelling image, making your photos stand out. Remember, even small changes in angle can dramatically alter the mood and story your photo tells. So, be bold and explore various viewpoints—your next stunning shot might just come from a perspective you hadn’t considered before.
Incorporate Editing and Filters Wisely

While editing and filters can enhance your smartphone photos, using them wisely is key to maintaining a natural and polished look. Start by choosing the right filter selection that complements your photo’s mood without overdoing it. Subtle adjustments usually work best to enhance colors, contrast, and sharpness. When applying editing techniques, focus on refining exposure, highlights, and shadows to bring out details without making the image look artificial. Resist the temptation to over-edit or add too many filters, which can detract from the photo’s authenticity. Instead, aim for a balanced approach that enhances your image’s natural beauty. Remember, the goal is to improve your photo while keeping it true to life, not to create an overly stylized or unrealistic result.
Practice Regularly and Review Your Work

Practicing your photography skills regularly is the best way to improve and develop your eye for great shots. Make it a habit to review your photos after each session, focusing on what works and what doesn’t. Conducting a thorough photo review helps you identify patterns, lighting issues, or composition mistakes, guiding your skill refinement. Don’t just take pictures—analyze them critically. This process highlights areas for improvement and boosts your confidence. Over time, consistent practice and honest review sharpen your eye for detail, enabling you to capture more compelling images. Remember, every shot is a learning opportunity. Keep practicing, reviewing, and refining, and you’ll see your smartphone photography skills grow exponentially.
Frequently Asked Questions
How Can I Improve Low-Light Smartphone Photography?
To improve low-light smartphone photography, start by adjusting your Smartphone camera settings for better exposure. Use a lower ISO to reduce noise and increase shutter speed to capture sharper images. Follow low light photo tips like holding your phone steady or using a tripod, and enable night mode if available. These steps help you capture clearer, more vibrant low-light photos without needing extra equipment.
What Accessories Can Enhance My Smartphone Photography?
You can enhance your smartphone photography by using lens attachments that add wide-angle, macro, or telephoto capabilities, giving your photos more creative options. A portable tripod stabilizes your shots, especially in low light or for long exposures, resulting in sharper images. These accessories are compact and easy to carry, making it simple to upgrade your photography game anytime, anywhere. Try experimenting with different lens attachments and always keep your tripod handy for steady shots.
How Do I Stabilize My Phone for Clear Shots?
Imagine capturing a breathtaking sunset without blur—that’s possible when you stabilize your phone. Use a tripod for maximum stability, ensuring steady shots even in low light. Incorporate grip techniques, like holding your phone firmly with both hands and bracing your elbows against your body, to prevent camera shake. These methods considerably improve tripod stability and help you achieve clear, sharp photos every time.
Can I Shoot Professional-Quality Photos With a Smartphone?
Yes, you can shoot professional-quality photos with your smartphone. Focus on adjusting camera settings like exposure and focus to enhance your shots. Use editing techniques afterward to fine-tune brightness, contrast, and sharpness, giving your images a polished look. Practice composition and lighting to improve your skills. With the right camera settings and editing techniques, your smartphone can produce stunning, professional-looking photos.
How Do I Avoid Common Smartphone Photography Mistakes?
Picture a tightrope walker balancing perfectly—your goal is to avoid common smartphone photography mistakes. Use good lighting techniques like natural light or golden hour to illuminate your subject, and apply composition tips such as the rule of thirds to create balance. Steer clear of shaky shots by stabilizing your phone and check focus before capturing. With these strategies, you’ll master the art of steady, well-composed photos every time.
Conclusion
Now that you’ve got these tips, you’ll be snapping stunning shots like a pro, even if you’re still waiting for your hoverboard. Remember, practice makes perfect—so keep experimenting, review your photos, and don’t be afraid to get creative. As the great Ansel Adams once said, “You don’t take a photograph, you make it.” So, grab your smartphone, channel your inner artist, and start capturing moments that truly pop.