
Your projector setup looks amazing when you control the environment, choose a quality screen, and position the projector correctly. Avoid bright lights and glare by dimming or blackout curtains, and make sure your projector is calibrated well. Proper placement and stable mounts prevent blurriness or distortion. When all these factors come together, your images will be vibrant and sharp. Keep exploring for tips that help you perfect your setup and realize the full potential of your projector.
Key Takeaways
- Proper lighting control enhances image vibrancy and prevents washout, making setups look more impressive.
- High-quality, well-maintained screens ensure sharpness and accurate color reproduction.
- Correct projector placement and stable mounting prevent blurriness and distortion.
- Accurate calibration of equipment optimizes image clarity and overall display performance.
- Coordinating environment factors like light control and screen quality creates a cohesive, immersive viewing experience.
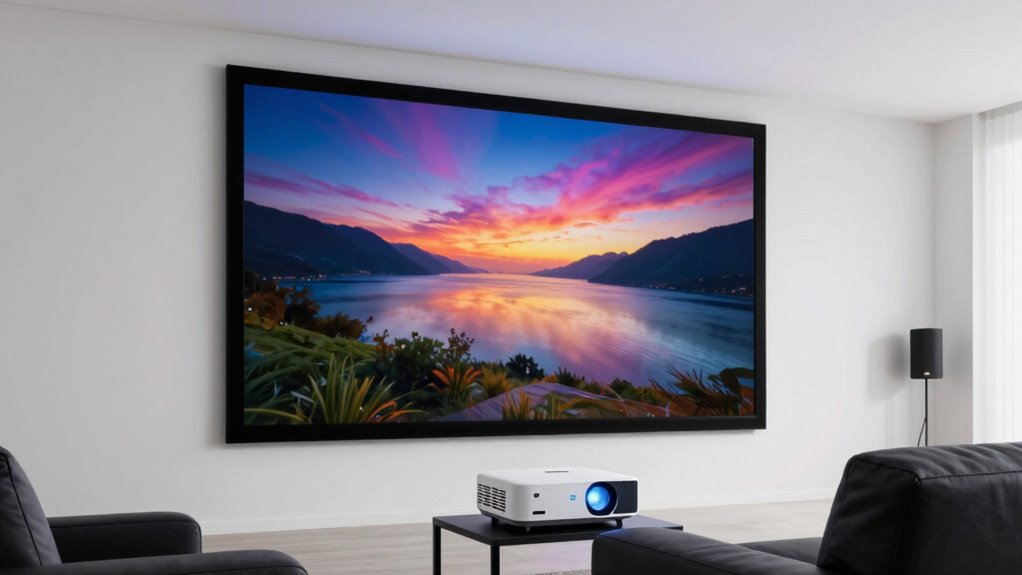
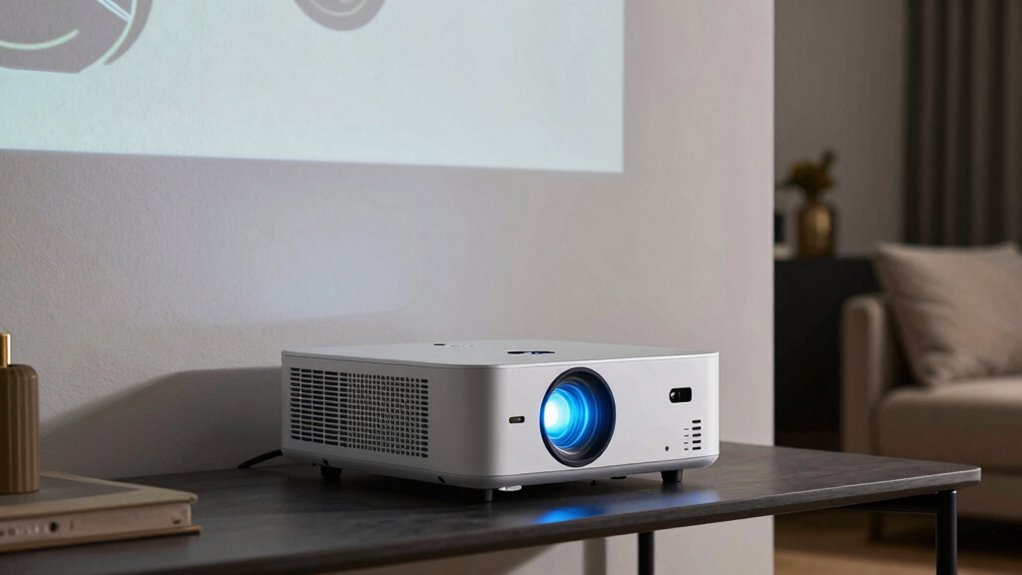
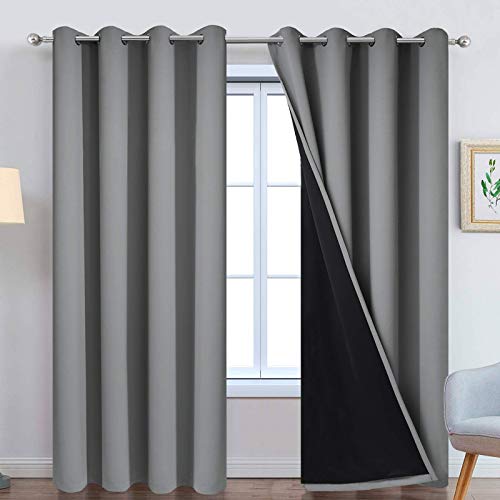
A projector setup can transform a space into a cinematic paradise or fall flat with blurry images and poor color. The difference often comes down to two critical factors: lighting conditions and screen quality. If you want your projector to shine, you need to understand how these elements influence the viewing experience. Bright rooms with lots of ambient light can wash out images, making them look dull and indistinct. Even the highest-quality projector will struggle if the environment isn’t controlled. To get vibrant images, you should consider dimming the lights or choosing a space with minimal natural light during viewing times. Heavy curtains or blackout blinds can make a significant difference, guaranteeing that your projected images aren’t competing with sunlight or other bright sources.
Screen quality also plays a pivotal role. A poorly chosen or damaged screen can ruin the clarity and color accuracy of your projection, regardless of your projector’s specs. Opt for a screen designed for high contrast and sharpness, ideally with a matte surface that diffuses light evenly. This helps prevent glare and hotspots, giving you a more consistent image across the entire display. If you opt for a painted wall instead of a dedicated screen, make sure it’s a neutral, non-reflective color, as bright or glossy surfaces can cause unwanted reflections and distortions. Investing in a good screen isn’t just about aesthetics; it’s about creating an environment where your projector’s capabilities are fully realized. Additionally, understanding the importance of measurement tools can help you accurately assess your setup and optimize each element for the best possible viewing experience. Proper calibration of your equipment can also enhance image clarity and overall performance.
Beyond just lighting and screen quality, the setup’s positioning matters. Proper placement of your projector ensures the image is sharp and correctly proportioned. If it’s too close or too far, the picture may be blurry or stretched out. Keep the projector aligned with the center of the screen and at an appropriate distance to maximize clarity. Using a mount or stable surface reduces vibrations and movement, which can cause blurriness or misalignment over time. Additionally, selecting a projector with a suitable contrast ratio can significantly improve image depth and detail, especially in darker scenes.
In the end, the key to an amazing projector setup is understanding that the environment and equipment work hand-in-hand. You can have all the latest technology, but if the lighting conditions aren’t controlled or the screen isn’t suitable, your viewing experience will suffer. Conversely, optimizing these factors transforms ordinary spaces into immersive entertainment zones, with crisp images and vibrant colors that truly pop. When you pay attention to these details, you unleash the full potential of your projector, creating a cinematic experience worth sharing.

Mdbebbron 120 inch Projector Screen 16:9 Foldable Anti-Crease Portable Projector Movies Screens for Home Theater Outdoor Indoor Support Double Sided Projection
- Portable and Lightweight: Foldable design for easy transport
- Versatile Usage: Suitable for home, office, outdoor, and more
- Anti-Crease Material: Made of high-quality polyester fabric
As an affiliate, we earn on qualifying purchases.
As an affiliate, we earn on qualifying purchases.
Frequently Asked Questions
How Does Room Lighting Affect Projector Image Quality?
Room lighting greatly impacts your projector image quality by affecting color accuracy and light diffusion. Bright ambient light washes out the picture, reducing contrast and making colors less vibrant. To optimize image quality, dim or control room lighting, allowing the projector’s light to shine through without interference. This improves color accuracy and guarantees light diffusion remains balanced, giving you a clearer, more vivid picture that looks amazing rather than disappointing.
What Is the Ideal Distance Between Projector and Screen?
Think of your projector as a painter, and the distance to the screen as the brush’s reach. The ideal distance depends on your desired screen size and projection angle. Generally, for a clear, sharp image, position your projector about 1.5 to 2.5 times the screen’s width away. Adjust the projection angle to avoid distortion, ensuring your scene is perfectly framed and visually engaging.
How Important Is Projector Lens Quality?
Projector lens quality is essential for sharp, vibrant images. A high-quality lens with better lens coating reduces glare and enhances color accuracy, making your picture clearer. Proper optical alignment ensures the image stays focused and distortion-free. Investing in a good lens improves overall picture quality, minimizes issues like blurriness, and creates a more immersive viewing experience. Don’t overlook lens quality—it’s vital to achieving that professional, stunning projection setup you desire.
Can Screen Material Improve Image Clarity?
Yes, screen material can markedly improve image clarity. When you choose a screen with the right texture, it minimizes light diffusion and enhances sharpness. Material reflectivity also plays a key role; a high-reflectivity surface boosts brightness and color accuracy, making images pop. By selecting a screen with ideal texture and reflectivity suited to your projector, you’ll notice clearer, more vibrant visuals, elevating your viewing experience dramatically.
How Do Ambient Reflections Impact Picture Contrast?
Ambient reflections are like sneaky shadows that dim your movie’s brilliance. They cause contrast reduction by bouncing ambient light into your eyes, muddying dark scenes. Reflection control through surface finishing—like matte screens—helps absorb stray light, preserving contrast. To keep your picture crisp, minimize ambient reflections by controlling room lighting and choosing surfaces designed for reflection management, ensuring your setup looks as stunning as intended.
Yakamok 100% Blackout Curtains 84 Inches Long, 2 Thick Layers Heat and Full Light Blocking Soft Thermal Insulated Drapes for Bedroom(52" Wide Each Panel, Grey, 2 Panels)
- Package Includes: 2 panels, each 52" wide x 84" long
- Easy to Hang: Silvery grommets fit many rods
- Full Light Blocking: 100% blackout with double layers
As an affiliate, we earn on qualifying purchases.
As an affiliate, we earn on qualifying purchases.
Conclusion
To make your projector setup stand out, focus on proper placement, quality equipment, and ideal lighting. To avoid disappointment, double-check your screen alignment, invest in good accessories, and control your environment. To enjoy your viewing experience fully, plan ahead, test thoroughly, and adjust as needed. When you prioritize these steps, you create a space that’s inviting, immersive, and enjoyable—transforming your setup from average to amazing and ensuring every movie night or presentation feels just right.

Tonalee Projector Mount Wall or Ceiling Projection Mount Bracket with Adjustable Height and Extendable Arms Mounts for Home and Office Projector
- Mount Compatibility: Suitable for projectors with 3-4 screw holes
- Installation Types: Ceiling, flush, and wall mounting options
- Material and Durability: Made of high-grade steel for stability
As an affiliate, we earn on qualifying purchases.
As an affiliate, we earn on qualifying purchases.

DSLRKIT Lens Focus Calibration Tool Alignment Ruler Folding Card(Pack of 2)
- Lens Focus Calibration Tool: Compact and easy to use
- Accurate Focus Testing: Helps verify auto-focus precision
- Adjust Camera Focus: Identify and correct focus errors
As an affiliate, we earn on qualifying purchases.
As an affiliate, we earn on qualifying purchases.