TL;DR
Acoustic dampening inside a closet improves sound clarity but doesn’t fully block noise; isolation and ventilation are key. Proper placement and sealing make a closet a surprisingly good, budget-friendly vocal booth, if you treat it carefully.
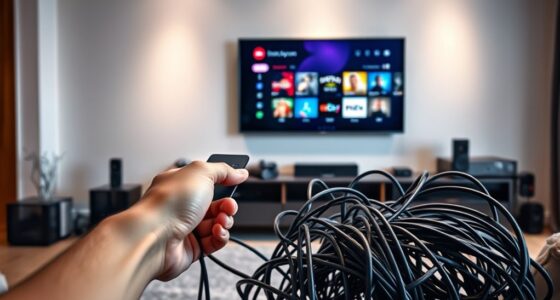
Ever wondered why a closet can suddenly become your best friend for recording vocals or making videos? It’s all about how small, enclosed spaces naturally tame echo and reverb. But turning a closet into a quiet, professional-sounding spot isn’t just about slapping foam on the walls. It’s a mix of smart placement, sealing gaps, and understanding the difference between dampening sound and blocking noise.
This guide will show you how to get the best out of your tiny studio, whether you’re doing voiceovers, streaming, or even AI work. We’ll cover the biggest myths, share real-world tricks, and explain what actually works — so you get clear, professional results without wasting money on stuff you don’t need.
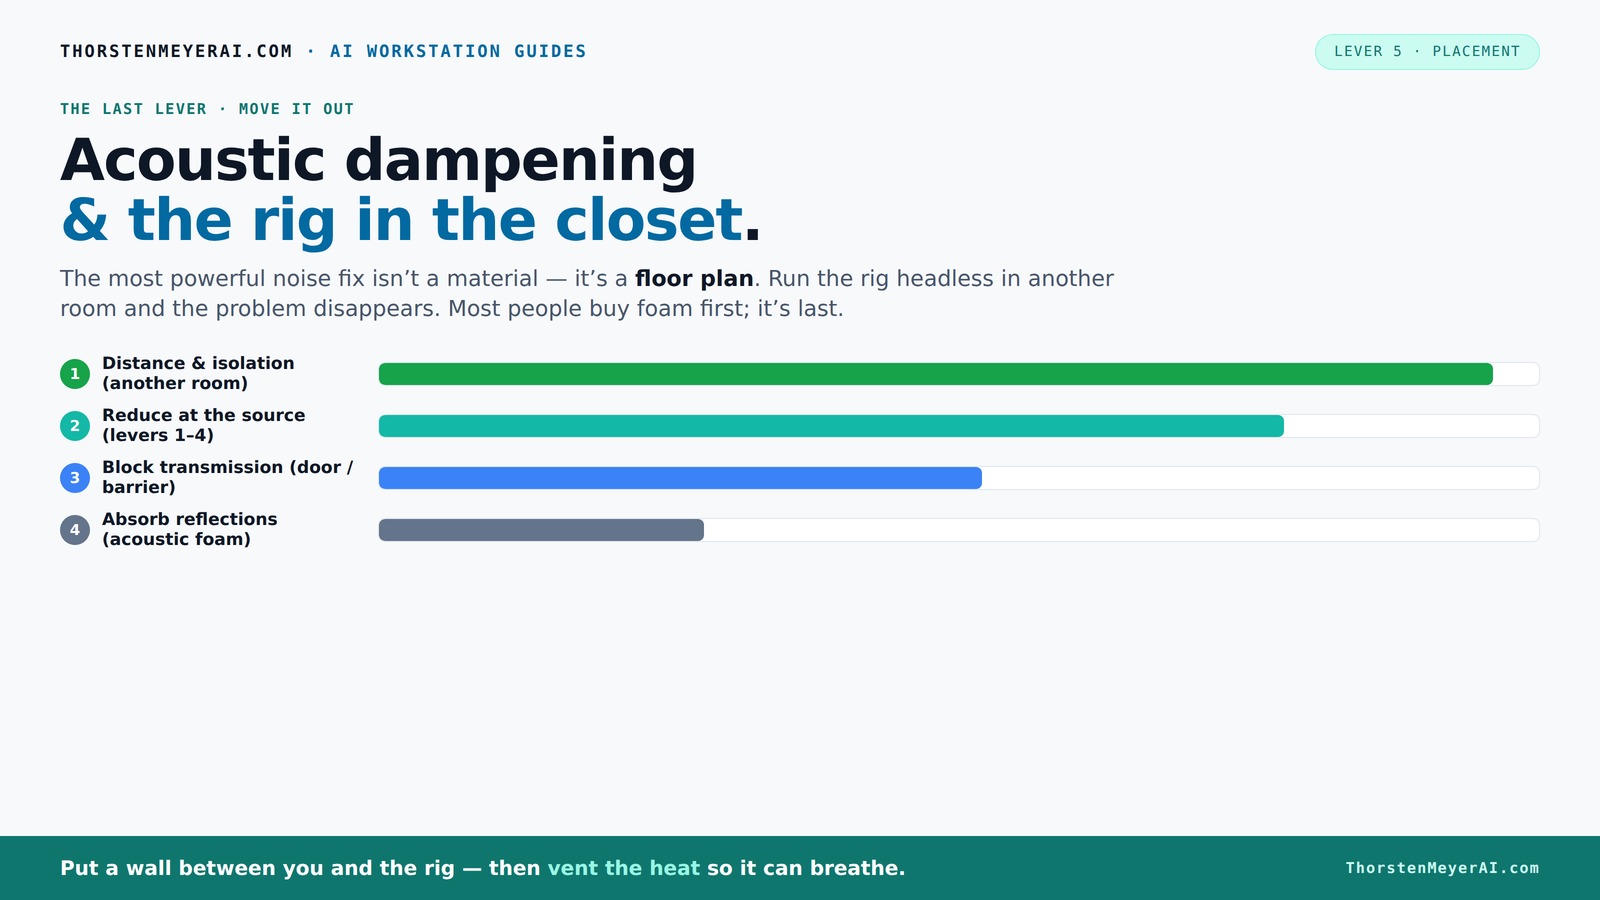
Acoustic dampening
& the rig in the closet.
The most powerful noise fix isn’t a material — it’s a floor plan. A rig you can’t hear because it’s in another room beats any amount of foam. Tap the approaches in Part 1 to see what actually works.
(another room)
(levers 1–4)
(door / barrier)
(acoustic foam)
Contain the noise, not the heat
Key Takeaways
- Sealing gaps in the door and around vents is the most effective way to reduce sound leakage from a closet rig.
- Placement of acoustic panels at reflection points dramatically improves vocal clarity in small spaces. For more tips, see this guide on acoustic treatment placement.
- Ventilation is non-negotiable; a sealed closet traps heat, risking overheating and throttling.
- DIY solutions like blankets and foam work well for temporary or budget setups, but consider purpose-built enclosures for long-term use.
- Low-frequency issues in small closets can be tamed with corner bass traps, improving overall sound quality.

Focusound 52 Pack Acoustic Foam Panels 1" x 12" x 12" Sound Proof Foam Panles Soundproofing Noise Cancelling Wedge Panels for Home Office Recoding Studio with 300PCS Double-Side Adhesive
Soundproofing - Acoustic foam panels triangular grooves structure for better noise absorption, helps to reduce and absorb unwanted...
As an affiliate, we earn on qualifying purchases.
As an affiliate, we earn on qualifying purchases.
What a Closet Rig Can and Can’t Do for Your Sound
A closet can be a surprisingly good spot for recording, but it’s not magic. It naturally dampens echo because of its small, enclosed volume. Yet, it’s not soundproof. That means noise from outside can still sneak in, and your sound can leak out if you don’t seal gaps.
In real-world terms, a closet turns into a quiet zone mainly for vocals or speech, not for isolating loud equipment from neighbors or roommates. Think of it like a mini vocal booth — great for clarity but not a soundproof vault.
For instance, a YouTuber converted her closet into a vocal nook with blankets and foam, and her recordings suddenly sounded clearer. But her neighbors still heard her through the door gaps.
Understanding these limitations helps you set realistic expectations. You won’t get total silence, but with proper treatment, you can significantly improve sound quality and reduce distractions. Check out home theater and audio setup tips for more advice. This means focusing on what matters most—clarity and reducing echo—rather than trying to eliminate all outside noise, which is often impractical in small, shared spaces.

Audimute Soundproofing Acoustic Door Seal Kit - Door Sweep and Seal - (Standard Size)
Includes a Door Seal (3/16" x 1/2" x 25') and a Door Sweep (1/2" x 1.5" x 4').
As an affiliate, we earn on qualifying purchases.
As an affiliate, we earn on qualifying purchases.
Acoustic Dampening vs. Soundproofing — Why They’re Not the Same
Acoustic dampening and soundproofing often get lumped together, but they serve different purposes—and confusing the two can lead to ineffective setups. Dampening reduces echo and internal reflections, making your recordings clearer and more natural. It’s about controlling how sound behaves inside your space.
Soundproofing, on the other hand, involves preventing sound from passing through walls, doors, or vents. It’s about creating a barrier to keep noise in or out. This requires adding mass, sealing gaps, and sometimes even structural modifications.
For example, hanging foam panels inside your closet absorbs internal reflections, which prevents your voice from bouncing around and sounding muddy. Sealing the door gaps with weatherstripping or adding a solid door with mass helps block external noise from entering. The tradeoff is that dampening is usually easier and cheaper but won’t stop loud neighbors from hearing you or vice versa. Proper soundproofing is more complex and costly but essential if you need complete isolation. Most home setups find a balance—using dampening materials to improve clarity while sealing key gaps to reduce noise leaks—resulting in a more controlled environment suited to podcasting or voice work.
Understanding this distinction guides you to prioritize treatments that match your goals, whether it's clarity or silence, and helps avoid wasting money on ineffective solutions.
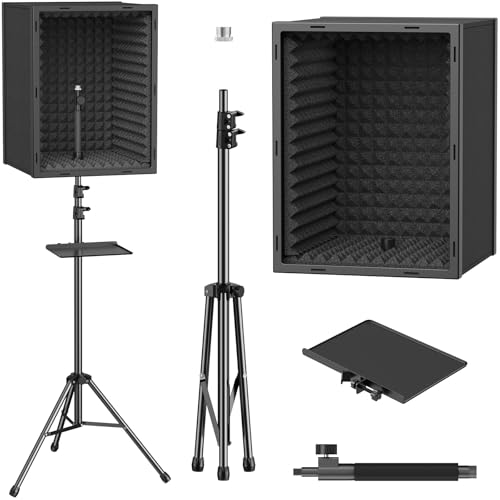
TONOR Personal Vocal Booth, Microphone Isolation Shield for Studio, Framed Acoustic Foam Box, Sound Absorbing, for Professional Recording, Podcast, Singing, Adjustable Height, Max 190 cm/53.1inch
Sound Absorption & Isolation: This vocal booth features a box design combining five high-density foam and sound absorbing...
As an affiliate, we earn on qualifying purchases.
As an affiliate, we earn on qualifying purchases.
Where to Place Acoustic Panels and Blankets for Best Results
Placement is everything. Start by identifying your mic’s first reflection points — typically the wall behind and beside it. These spots reflect sound directly into the mic, muddying clarity. If you ignore these points, your recordings will suffer from echo and comb-filtering effects that make your voice sound distant or metallic.
Use a mirror to find these points: sit at your mic, move a mirror along the wall, and when you see the mic in the mirror, that’s where you want acoustic treatment. This method ensures you treat the areas that cause the most unwanted reflections.
In a closet, focus on the wall behind the mic and the door. Adding foam or blankets there will significantly cut down on early reflections and echo, resulting in a more focused and natural sound. Don’t forget the corners and ceiling—these areas can trap sound and cause low-frequency buildup, which dulls your recordings.
For example, a streamer placed foam panels at the reflection points and a thick blanket over the door, noticing an immediate drop in echo and background noise. Proper placement enhances clarity without the need for excessive treatment, saving you money and effort.

Aokeo Microphone Isolation Shield, Foldable Mic Shield with Triple Sound Insulation, Reflection Filter with 3/8" and 5/8" Mic Threaded Mount for Recording Studio, Podcasts, Singing, and Broadcasting
The Microphone Isolation Shield features a sound-proof foam front and a ventilated metal back panel to eliminate noise...
As an affiliate, we earn on qualifying purchases.
As an affiliate, we earn on qualifying purchases.
Sealing the Door, Gaps, and Floor — The Hidden Game Changers
Sound leaks through gaps, cracks, and the door itself. Sealing these is like closing the gaps in a dam — it prevents noise from escaping and outside noise from sneaking in. Ignoring this step often results in a false sense of isolation, where you think your treatment works but external noise still intrudes.
Use weatherstripping around the door frame to seal gaps where sound escapes. Adding a door sweep or draft stopper at the bottom prevents sound from leaking underneath. For small cracks or holes, acoustic sealant or mass-loaded vinyl can be applied to block sound transmission effectively.
A quick tip: even tiny cracks can let sound leak—sealing them can reduce noise transmission by up to 50%, according to acoustic experts. This means sealing isn’t just about reducing echo but about significantly improving sound isolation.
One DIY creator used weatherstripping and a heavy curtain over the door—combined, these methods drastically reduced noise bleed, making her recordings much cleaner and less susceptible to external interruptions. The tradeoff is that sealing weak points is often inexpensive and easy but requires attention to detail to be effective. The payoff is a much quieter environment, which is crucial for professional-sounding recordings in shared spaces.
Corner Bass Traps and Low-Frequency Treatment — When to Use Them
Low frequencies tend to build up in corners, creating boominess and muddiness that can obscure your vocal clarity. Bass traps are designed to absorb these low-end waves, creating a cleaner, more balanced sound. Without addressing low frequencies, your recordings can sound boomy or uneven, especially if your space lacks natural bass response.
In small closets, adding DIY bass traps in the corners can dramatically improve clarity. You can build inexpensive traps with rockwool or mineral wool, or opt for commercial panels designed for low-frequency absorption. Proper placement in the corners ensures maximum absorption of standing waves that cause muddiness.
For instance, a musician added corner traps and noticed a marked reduction in low-end rumble, making her vocals sound more natural and balanced. The tradeoff is that bass traps are more effective if properly placed and of sufficient thickness—usually 4 inches or more—to target low frequencies. Recognizing when your recordings suffer from boominess or uneven bass response helps you decide whether this step is necessary.
DIY Solutions vs. Professional Enclosures — What’s Worth Your Time and Money?
Small, DIY treatments like blankets, foam, and foam panels mounted with hooks are budget-friendly and flexible. They’re perfect for quick setups or temporary needs, allowing you to experiment with placement and materials without significant investment. However, they often lack the durability and comprehensive sealing of professional solutions.
On the other hand, purpose-built soundproof enclosures or modular booths combine absorption, sealing, and ventilation to create a more controlled environment. These systems are designed to isolate sound effectively, but they come with a higher cost and complexity. For long-term or serious projects, investing in a professional enclosure can be worthwhile, especially if noise isolation is critical.
A YouTuber built a simple blanket-covered closet booth with a ventilation fan, and her recordings rivaled professional studios, proving that DIY can work if done thoughtfully. The key is balancing cost, effort, and your specific needs. If your setup requires frequent use or professional quality, a purpose-built enclosure may save you time and produce better results over the long run.
Check out [this guide](https://thorstenmeyerai.com/reduce-heat-noise-ai-workstation/) for more on balancing soundproofing and cooling in closet setups.
Ventilation and Heat Management — Keeping Your Closet Rig Alive and Cool
Placing a high-power rig in a sealed closet traps heat, risking overheating and performance throttling. Proper airflow is essential to prevent hardware from overheating and ensure stable recording sessions. Without ventilation, your equipment can overheat, leading to potential damage or throttling that reduces performance.
Use passive vents or quiet exhaust fans to pull hot air out and bring in cooler air. For example, a streamer installed a low-noise fan with ducting, and her rig stayed cool even during long sessions. This setup maintains optimal operating temperatures without introducing noise that would interfere with recordings.
Active ventilation ensures your hardware runs efficiently and prevents temperature spikes that could damage your equipment. It also reduces the risk of humidity buildup, which can cause mold or corrosion over time. Proper cooling is a critical component of a reliable, long-term closet studio setup, especially if you plan to record or stream regularly.
Learn more about cooling options at [this link](https://thorstenmeyerai.com/liquid-vs-air-cooling-inference-rig/).
Frequently Asked Questions
What is the difference between acoustic dampening, absorption, and soundproofing?
Acoustic dampening reduces echo and reflections inside a room, making sound clearer. Absorption is a method of dampening by materials like foam or fabric. Soundproofing blocks sound transmission through walls, doors, or vents, preventing noise from leaking or entering.Where should I place acoustic foam or panels in a closet studio?
Focus on the first reflection points — behind and beside your mic. Use a mirror to find these spots, then add foam or blankets there. Also, treat the door and corners to reduce echo and low-end buildup.Do I need bass traps in a closet, or are panels enough?
If your recordings sound boomy or muddy, adding bass traps in the corners helps tame low frequencies. In small closets, bass traps can make a noticeable difference in overall clarity.How thick should acoustic panels be for a small closet?
2-inch panels are usually enough for small spaces, but larger rooms or more serious treatment might benefit from 4-inch panels. Thicker panels absorb lower frequencies more effectively.Can a closet really work as a vocal booth?
Yes, with proper treatment, sealing gaps, and ventilation, a closet can produce professional-sounding vocals. It’s all about controlling reflections and preventing noise leaks.Conclusion
Your closet can become a surprisingly good recording space — if you treat it right. Focus on sealing gaps, proper placement of absorptive materials, and ensuring your rig stays cool. With a few practical tweaks, you turn a tiny, noisy closet into a quiet, professional-grade nook.
Remember: the magic isn’t just in absorbing sound — it’s in controlling where that sound goes and how your gear stays happy. Treat your space like a studio, and your voice will sound better than ever.